HTML Pages Pics


Click to visit our brand new site!
Showing posts with label Cake. Show all posts

Saturday, August 6, 2016

Happy Saturday!


Happy Saturday! I hope you all are having a wonderful start to your weekend. We just thought we would pop in with some photos of our new cake stand and cloche that our sponsor etúHOME sent us. It is absolutely gorgeous and I love the history behind each piece! The cloche is made from recycled glass mouthblown into original 19th century molds and rimmed with tin and topped with a natural cork. And each cake stand is made from wood that was either reclaimed or recycled from 19th century buildings.  The details are just so impressive! And guess what - they are offering our readers 20% off their purchase by using the code: DEARLILLIE when checking out on their website. They have so many beautiful pieces you should check out. 


 Source List:

Wall Color - Dove White by Benjamin Moore in eggshell
Door Color - Mopboard Black by Benjamin Moore in Semigloss
Trim Color - Simply White by Benjamin Moore in Semigloss
Cake Stand - EtuHome
Demijon Cloche - EtuHome
Table Runner - Pottery Barn 
Chair - World Market
Pillow - Birch Lane 
Goblets - Birch Lane 
Urn used as Vase - The Arrow's Nest

Have a wonderful rest of your weekend!


SaveSave

Sunday, February 10, 2013

Mini Valentine's Cake Tutorial with Love Template


Lillie, Lola and I had some fun making some mini valentine's cakes last week. They make a fun little dessert so I thought I would share how we did it in case anyone wanted to make some. I had seen several ombre cakes on pinterest and thought it would be fun to try! I had planned on making this a four layer cake so we made four different shades of pink but I didn't make them thin enough so we ended up just doing two layers on each cake and ended up making eight two-layer cakes instead of four four-layer cakes. Here's what they looked like when you cut into them:


So, the first thing we did was make the cakes. I love homemade frosting but have to admit I find cake mixes to be better than homemade cake! For this we just used a Betty Crocker yellow cake mix and we added graduation amounts of pink food coloring. We used two cakes mixes so we could make four 9" round cakes, but if I were to do it again I would definitely just use one cake mix and make the layers thinner and maybe make just three 9" round cakes. 

For the icing we used my favorite cream cheese frosting that I got from my mom - when we were little this was the frosting she always put in her homemade carrot cake. My parents and sisters loved carrot cake but I was not a fan. I would just eat off the delicious icing and not touch my cake. =) Anyway here is the recipe:

Cream Cheese Frosting:

3 Tbsp. butter
4 to 5 oz. cream cheese
1 tsp. vanilla
1/2 Tbsp. maple syrup (I sometimes do a full tablespoon)
 3 cups confectioners sugar

Soften butter and cream cheese then add the rest of the ingredients until they are nice and smooth. Depending on how much icing you like you might want to make a little extra frosting. We like a lot of icing on our cakes. For the two cake mixes we made we doubled the above recipe and it wasn't quite enough. It might have been enough if it weren't for the fact that my helpers and I really like to "sneak" licks of the frosting while we are working. If you just like a light coating of icing and you are making one cake mix for a total of four mini cakes I think the above recipe would be enough. If you like a heavier coating of icing I would recommend doing about one and a half times the above ingredients.


Next I took a the top of a clothing gift box and cut out four circles. I used the circular cookie cutter I was going to use on my cakes to trace and make sure they were the right size:

Now I put one of the cardboard circles on top of an upside down vase so that I would be able to twist around it to frost the cakes (I am sure there are more professional things out there made for this, but I always just use whatever I can find on hand). Then used a knife to trim off the top of my cake a bit so it would be a little flatter and I used my little circular cookie cutter and cut out my first layer. I had two little helpers so this part was a bit messy. =)

I put the first layer on and then added some frosting and then put on the second layer.

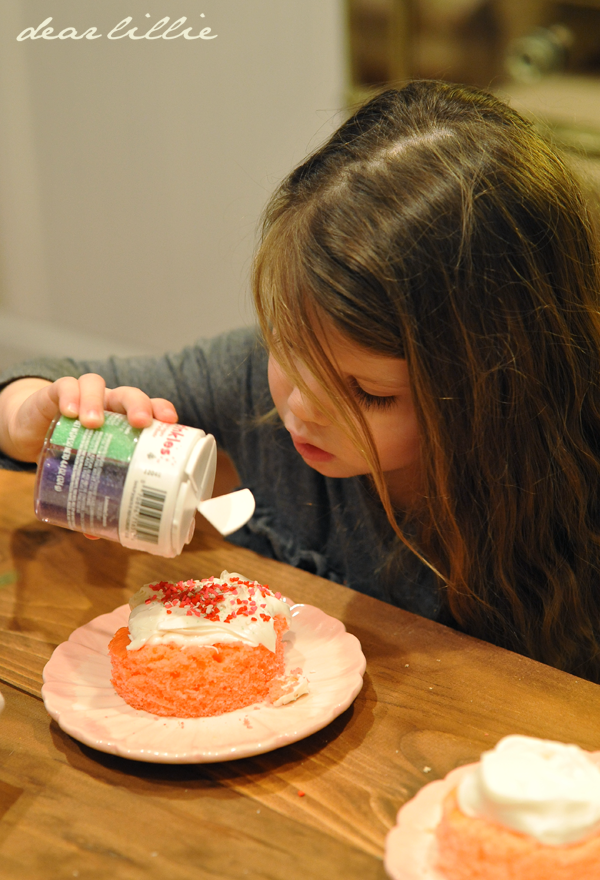
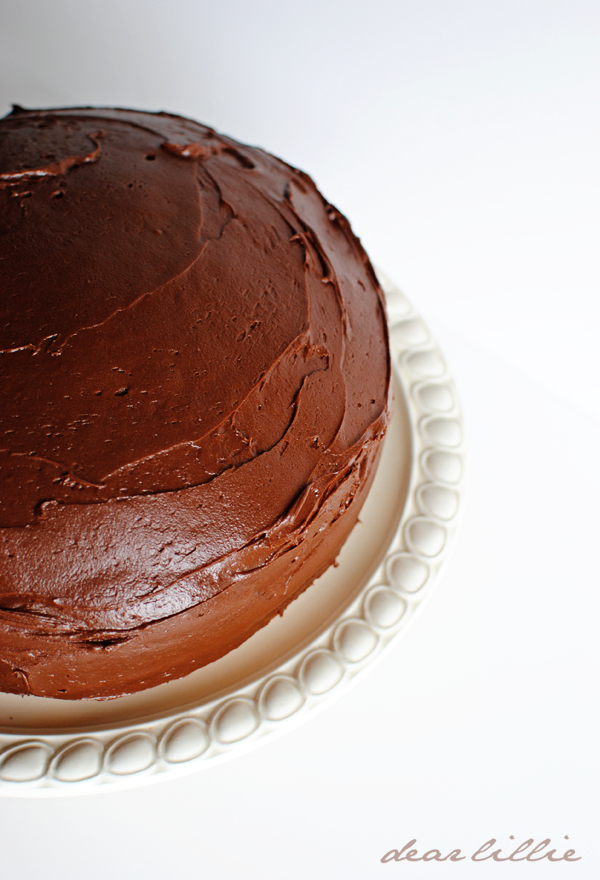
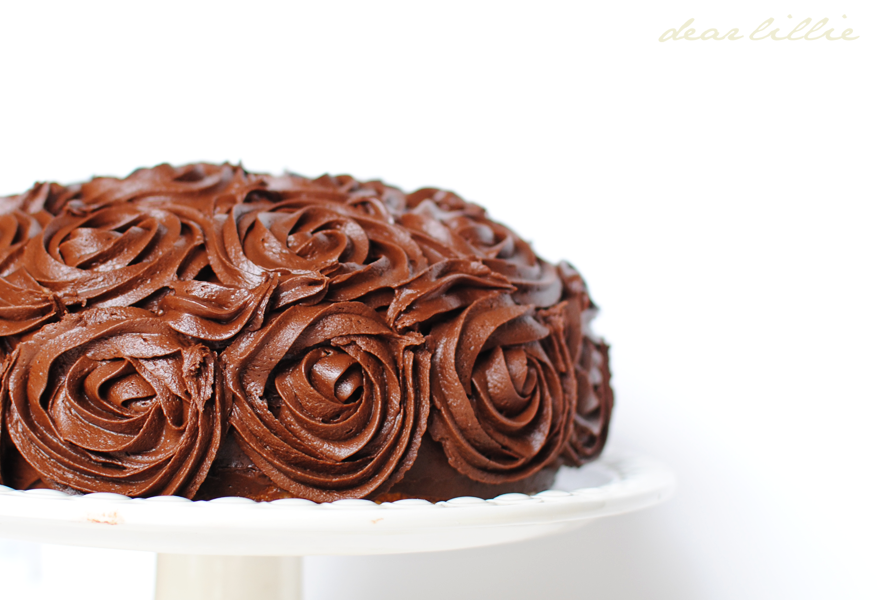
Then I just frosted the whole thing with a yummy cream cheese frosting (recipe above) and added a cutout that said love. We added some glittery sprinkles to the cake and some silver glitter to the word love because toddler sized girls LOVE glitter! =) Frosting the cake was a bit difficult partly because I had two little helpers and partly because I probably should have refrigerated the cakes a bit so they didn't crumble so much. I had planned on doing something fancier for the frosting but in the end it was just easier to do a very basic frosting job on these. And yes, I know they are a little on the messy side. =)

If you want to make your own love toppers here is a template for the one we made.

We made four cakes that looked like the one above and then we made a few more layered ones and then Lillie and Lola also did some one layer ones and had lots of fun adding all the sprinkles they wanted on those one.

When we were done we added the four cakes to the four place settings on our table.


I hope you are having a great Sunday! I'll be back tomorrow to show you the rest of our Valentine's decorating.


Saturday, February 9, 2013

Happy Saturday!


I just wanted to pop in and say I hope you all have a wonderful Saturday! I'll be back tomorrow (probably in the evening) and show you how the girls and I made these fun little mini valentine's cakes!

Tuesday, January 8, 2013

Lillie's Birthday Cake


I've got this one last post here with some random shots and then hopefully after this I will have enough of my more recent photos edited to start posting photos of some of our new products, Jamie's shower and two photo shoots that we've done during the past week and a half. We've gotten quite a few e-mails wondering about Lillie's birthday party this year. (You can see her Cinderella party here, her Twelve Dancing Princesses party here, and her Pink Party here.) We actually didn't have a "real" party for her this year. Instead she chose to go to the Great Wolf Lodge with my sister, Dana, and we had a little cake and some presents at our house with just our family and my two sisters and brother-in-law who were all visiting. I did take some photos of her cake (I was expecting her to request a Barbie or princess cake but she actually requested this cake!) and of her opening a couple of presents and blowing out her candles and seeing how I am behind on all of my recent photos thought I would share them today. This is the same cake that we did this summer but this time we did it with a cream cheese frosting instead of chocolate frosting.


Also, I wanted to let you know that my friend, Melaine from My Sweet Savannah got locked out of her blog =( and had to start new. Here is her new blog address: www.mysweetsavannahblog.blogspot.com

Have a lovely evening! I'll be back soon!

Sunday, July 22, 2012

An Easy Chocolate Rosette Cake


I had seen this rosette style cake on Pinterest a while back and finally gave it a try! I wanted to make it using chocolate icing though and a yellow cake. Seeing how it was my first time ever using any actual cake decorating tools I didn't really know what I was doing, but I have to say it turned out to be much easier than I anticipated. Mine looks a little messier than I would like and I definitely need to practice more doing the filler swirls between the rosettes but all in all for a first try I was quite happy with it and it really was so easy!

I didn't take step by step photos but I can pretty easily explain the steps. First I just used a Betty Crocker Super Moist cake yellow cake mix and filled two circular 9" cake pans.

Here is the recipe for the frosting:

3 sticks butter
2 cups Hershey's Cocoa 
9 cups powdered sugar
1/3 milk
1 tablespoon vanilla

Melt the butter. Stir in cocoa. Alternately add powdered sugar and milk and beat on medium speed. Add more milk if needed (I don't even think I used quite 1/3 cup). Stir in Vanilla. Makes about 6 cups of frosting.

YOU WANT IT TO BE KIND OF STIFF SO IT HOLDS THE SHAPE OF THE ROSETTE.

I have to say I ended up with a little extra frosting but that was better than not having enough and although I had a little extra it wasn't a ton extra.

First I placed the bottom round cake layer down and frosted the top of it. Then I placed the second layer on top of it. I normally like to make three layer cakes but for this one I decided to go ahead with just two to make it easier to do the rosettes on the side. Once I placed the second tier on I just iced the top of it and then the sides in a very basic not so pretty manner.

This is what it should look like before you start working on your rosettes:


You can find the Tip Coupler here, the #1M tip here and the disposable bags here

Then I followed this fabulous tutorial from "i am baker". The instructions were so easy and hers looks awesome (way better than mine!)


And there you have it, a super easy chocolate rosette cake!


 I also wanted to let you know our "Love Is..." pillow cover sets are back in stock!


I hope you all had a fabulous weekend!

Related Posts Plugin for WordPress, Blogger...