


When we first walked through this house and fell in love with the neighborhood and floorpan we also knew that we would eventually completely redo both of the upstairs bathrooms (the powder room downstairs was more of an easy fix). Originally we thought we would do a temporary fix on the hall bathroom and completely gut the master that first winter. After living in the house though for a few months we realized that it made more sense to do the hall bathroom first for a whole bunch of different reasons, so we did that last winter and added some finishing touches this fall. Now that we have pretty much finished all of the main spaces in the house, this is the last room left to be tackled. I've held off giving it a mini makeover because we have been torn on how soon we would do a completely overhaul. Seeing how we still haven't decided exactly what we are going to do in here (keep the footprint the same to keep the cost down or expand it quite a bit so that we can add a tub) and therefore it may be another year or so before we do it, so I figured it was finally time to at least give this bathroom an inexpensive sprucing up because it always drove me crazy walking in here. (We are considering doing it this summer but most likely will wait until next summer).

Because I knew that we will be gutting this bathroom I didn't want to waste any money on changing out any of the fixtures which meant I had to embrace the brass. Ahhh! Although gold and brass are making quite the comeback and I personally have been loving how some of it looks, the pieces in here are straight from the 80's so not necessarily the pieces I would be choosing. =) That being said, I just went with it and painted the vanity a blue color that accented the brass. Then I switched out the knobs. I already had a few of them from a project from several years ago so I just had to pick up a couple more. I also painted all the trim and the window. After that I painted the walls with leftover paint from our family room and then painted the door the same color as all the rest of the doors in our house. After that I put down a new floor. I will have to look up the name of it but basically it just kind of floats on top of our current floor (I wouldn't have done it that way if this were a more permanent makeover but seeing how it's just temporary it made the most sense) and I have to say I am thrilled with how it turned out! I am not going to be doing any tutorial on how to do it because honestly I just kind of figured it out as I went along and certainly wouldn't be able to give any kind of proper info on it but I am sure if you google it there are some tutorial on how to do it. It's probably hard to tell in the photos but the tile was NOT in good shape so this made such a difference in person. I can't tell you how much better this feel walking in here now.
Once that was done it was time for the fun stuff. I took down the huge mirror and added two I found at HomeGoods. Just a little tip. Do NOT try to take down one of those mirrors by yourself. I think it was a miracle that I didn't end up with a major disaster. I did get it down and over to the doorway but it was a nightmare! Fortunately hanging the new mirrors was quite easy. I didn't really want to buy any new accessories for in here either so I went up to the attic and found a few old accessories like the loo sign, the aqua basket, and the jar holding the cotton balls all which I got years and years ago. I did get the basket to hold towels in at HomeGoods and Lola picked out the little heart dish for me while we were there.

I couldn't find a true before shot from this angle. You can see I had painted the window and Lola was busy priming the trim work for me. =)


We aren't actually using the IKEA fur thing as a bath mat. I just put it there for pictures because I was washing our one that we normally use there and it looked bare without anything there.


The light fixture drives me crazy still but it seems like such a waste to put up a new one when I am going to go with a completely different look when we redo the bathroom. I did remove the glass shade things to update it a tiny bit but it still looks pretty dated.

Cost breakdown:
Floor - I used about $80 worth of flooring (although you have to buy it in boxes and I needed two which came to a little over $110 I think)
Paint - I used a sample sized can for the vanity which cost $7 and I used paint leftover from other parts of the house for the trim, door and walls
Mirrors - $70 each (I was quite excited about them because they pretty much could go just about anywhere so once we redo this bathroom I may still be able to use them in here but if not I don't think I will have trouble finding another spot for them here or at Jason's or one of my sisters' houses)
Basket holding towels - $19
A few other miscellaneous accessories (little heart dish, hand towel, etc.) - $30
Except for the flooring and the paint everything else can be used again so really I am pretty happy with how it turned out! It's certainly not a fancy makeover but it feels so much more clean walking in here now.
Here are a few tips for making over a small bathroom on a budget.
1). Paint! Paint can really refresh a space and it's a quick, easy and inexpensive way to give it a whole new look.
2). Use creative ways for storage to help keep things organized and looking tidy - a basket filled with towels or toilet paper, or something hanging on the wall filled with washcloths can help provide extra space to keep things you use every day and free up space in your cabinets.
3).Changing out a large standard builder mirror for a more unique one can also really help personalize your bathroom and give it a more stylish look.
Source List:
Wall Color- Horizon in Eggshell by Benjamin Moore
Trim Color - Simply White in Semi-Gloss by Benjamin MooreDoor Color - Mopboard Black in Semi-Gloss by Benjamin Moore
Cabinet Color- Kentucky Haze by Benjamin Moore
Mirrors - HomeGoods
Flooring - Lowe's made by Shaw called VersaLock in the color Resort Teak
Bath Mat - IKEA fur throw just used there for photos
Basket with towels - HomeGoods
Shade - Lowes, Levolor
Basket by Toilet and Loo Sign - Hobby Lobby years and years ago
Pitcher on Toilet - HomeGoods
Knobs - Home Depot
Hooks with Jewelry - Lowe's
Glass Jar with cotton balls and Vase holding flowers on vanity - TJMaxx years and years ago
Little Heart Dish - HomeGoods
Little Gold Vase - Target (was a candle)
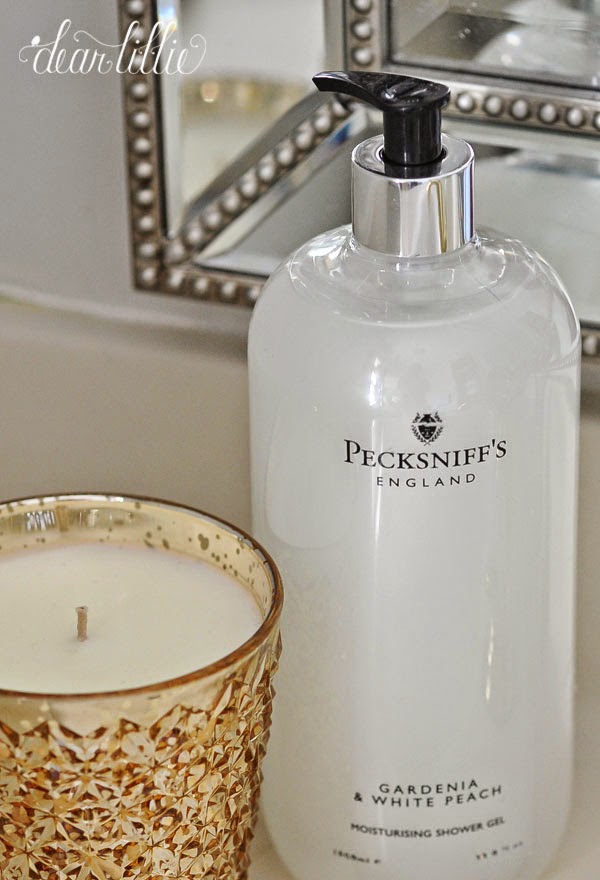
Soap - HomeGoods
Little Tray to the right of the right sink - holds powder that was a wedding gift and items I use daily like my glasses, eye cream, face wash, etc.
Flowers - Trader Joe's
Well, that's it for our little bathroom makeover! Now that all the painting in finished in the main spaces I've started in on the closets. I've got the linen closet completely emptied and have spent the last two days painting the trim and walls in there and actually am typing up this post while waiting for the shelves to dry. I am hoping to add a stencil to the back walls later today.
I hope you all have a fabulous weekend!

Love the updates and especially the mirrors! I never luck out on finding a pair of them. I'm inspired to pop back in our location to look again. Heading to Williamsburg next weekend - hoping for more of that unusually warm weather! Have a lovely Valentine's weekend.
ReplyDeleteLOVE this makeover...the flooring looks fabulous!
ReplyDeleteAny chance you'd leave it? I think the mini-makeover looks great!
ReplyDeleteHi! If it weren't for the shower yes, we'd probably consider leaving it.
DeleteHi there! Love this makeover - so cute! I painted my bathroom cabinets about a year ago to spruce things up, and they chip like crazy with all of our daily use. Any tips? Did you use any type of special primer or sealer? Thanks!
ReplyDeleteThanks, Jamie! We haven't been worried about that here because this is just temporary. However, for long term I would recommend priming first then using a semi-gloss paint that will have more durability. You can read about our kitchen cabinets here which is probably what would work well for bathrooms as well: http://dearlillieblog.blogspot.com/2013/09/how-i-painted-kitchen-cabinets-two.html
DeleteThat floor made a HUGE difference! How hard was the install? Do you have to use any major (power) tools? I have what appears to be a tinier bath in our upstairs and now your really got me thinking. Oh, also did you do it alone? Thanks
ReplyDeleteThank you! I did do it all myself with a box cutter (no power tools). It was a little tricky around the toilet, but other than that pretty easy! I would recommend wearing gloves though--I didn't and my fingers were a little numb after!
DeleteThank you for your help. I am seriously considering this. I just watched a YouTube video on it. Did you use an underlayment or just go right over the tile? Did you pull up the toilet or do it in place?
DeleteWe just went right over the tile and around the toilet (which took a little bit of effort but ended up matching up nicely).
DeleteI'm seriously considering doing this to an upstairs bathroom after seeing your results. We're you able to lay the flooring down in one day? Did you take the shoemold off the baseboards when putting down the flooring or is it just butting up the baseboards? Any caulking?
DeleteIt only took me one day, as I just put them up against the baseboards (had this been a longterm thing we would have removed the baseboards first). We didn't end up caulking it because its just a temporary fix for now and we wanted the demo to be as easy as possible when we do the full remodel. So far we are pretty pleased with how it turned out though!
DeleteLooks amazing. I love this makeover, so pretty and a fabulous facelift.
ReplyDeleteWhat a great `temporary`makeover. We moved into our home a year ago and are having the same issue regarding large or small bathroom reno. I would love to get the name of the product you used for the flooring if you can find it.
ReplyDeleteThanks! We bought it from Lowe's (made by Shaw called VersaLock in the color Resort Teak).
DeleteWOW! remarkable!
ReplyDeleteI love this makeover and am very impressed with your floor installation! The blue is so pretty and your really managed to make the gold fixtures work. I know what you mean about removing the builder mirrors. When we removed one in our guest bathroom, we ended up with a hole in the wall. Those things are really glued on there. Beautiful transformation!
ReplyDeleteShelley
Wow, Jenni, it looks wonderful! I'm sure the light bugs you, but honestly with the beautiful mirrors I didn't even notice the light until you mentioned it! You were smart not to change it or the faucets until you do the complete re-model.
ReplyDeleteI need to do some updating to my bathroom so I'm grateful to see this post. One thing I'm wondering about is what kind of beautiful countertop surface would work well with a tumbled marble floor and shower. I'm thinking there must be something lovely that would work better than the Corian I currently have. Hmmmm. . . .
Thanks so much, Richella! Hmm... I'm not really sure what would go best with tumbled marble. I hope you and your family are doing well!
DeleteIt turned out beautiful, you (as usual) did an amazing job. Did you take the mirror off by yourself? I would love to remove the ones we have in our home, but I'm so afraid, and with my luck, I know I'll get a cut or something. The new mirrors are so pretty, and what luck that you managed to find two.
ReplyDeleteThank you! And yes, but it is a complete miracle that I didn't have a major accident! Jon couldn't even carry it out of the room himself so I have no idea how I got it down alone while he was out! It is definitely a minimum two-person job!
DeleteWhoa, what a difference! I have one of those builder grade mirrors and i hate it. Time to go to Home Goods! ... and what is the deal with bathroom light fixtures?! They're all so awful. I've been looking online and can't find anything cute. This doesn't even look like the same bathroom. It's actually so bright and pretty now that you don't even notice the brass and the light fixture. I love the mirrors!
ReplyDeleteCindy
I love it. How about Edison bulbs for the light fixture? I saw it somewhere and it gave an old fixture an updated look. I love how you embraced the brass and made it current. I love the blue vanities.
ReplyDeleteThanks, Katie! And yes, that was my original plan actually! When I went back to pick some up though they were like $9 a bulb so seeing how this makeover is just a quick one I opted for an inexpensive pack of globe bulbs.
DeleteYour makeover looks great! I could live with it as is for a long time. I'm anxious to hear about your flooring. My master bath needs a total update but the biggest eyesore is the carpeting. Why did anyone think it was a good idea to use carpet in a bathroom? The rest of it isn't really that bad.
ReplyDeleteCindy
Would love to know the name of the blue paint on the cabinets.
ReplyDeleteHi! It's Kentucky Haze by Benjamin Moore.
DeleteLooks great Jenni. The vanity seems to reflect the chest in the bedroom with gold trim, so the brass looks good. Love the mirrors!
ReplyDeleteWow! It looks fantastic Jennifer! What a transformation! The blue cabinets look wonderful and your new mirrors....I love all of it. You did a beautiful job. What a sweet little heart dish Lola picked out and she's pretty good with that trim work! I would love to know what the flooring is when you find your box. I'm interested for our guest bath. Thank you!
ReplyDeleteThanks so much! We bought it at Lowe's. It is made by Shaw and called VersaLock (in the color Resort Teak).
DeleteThank you so much! Happy Valentine's Day to you and your sweet girls!
DeleteHi Jennifer, if the wood flooring was placed on top of the tile, how did it match up to the bedroom flooring without one being higher than the other? Love what you did and hoping to do something similar with a hall bath but not sure I can. Thanks!
ReplyDeleteThanks! In both of our upstairs bathrooms the flooring is higher than the rest of the floors so there's a threshold piece. This stuff is really thin as well though so it doesn't make a noticeable difference anyways.
DeleteIt looks so good! I love these types of budget-friendly make-overs since we are on a sort of spending freeze since moving into our farmhouse. I've put off doing much to our bathrooms because I keep thinking we'll overhaul them some day. This is a great in-between step... though it truly looks beautiful enough to keep as-is! I can only imagine what you'll do next! :) Happy Valentine's Day!
ReplyDeleteI'm surprised you didn't spray paint the light fixture to match trim on mirror. Beautiful fresh look
ReplyDeleteLove the new look! So pretty! Dianntha
ReplyDeleteI LOVE THIS..for so many reasons. I love the fact you used what was already there and transformed the look. It's so refreshing because many makeovers you see now people are ripping out and gutting the whole room. Which is fine, but if it's not in the budget, how do you live with what you have? I love how you mixed some of the stuff you already had with some new fresh things. I love how you kept the cost minimal knowing you will eventually redo the whole room, but what I love the most is that you did it mostly yourself!!! I have been on the fence about giving our kitchen a mini makeover. We renovated our downstairs last year except for the kitchen. I want to fix up our kitchen so it at least flows with the rest of the house. What my husband and I really want is quite an investment which isn't in the budget for about another two years. I am now inspired to set my summer goal to give our kitchen a mini makeover this year. I'll be sure to read your post on painting your cupboards. Thanks!!!
ReplyDeleteThis may be the best mini makeover I have seen. Your description and photos are great. It gives me ideas since I cannot afford any major work in my house and I have 3 1/2 outdated bathrooms.
ReplyDeleteI absolutely love the mirrors and the vanity color! What a great makeover...doesn't look the same!
ReplyDeleteThis is absolutely beautiful!!! I am not a fan of brass, but you make it look great in here. You do such a wonderful job decorating, whether you have lot or little to work with- thanks for the inspiration:-)
ReplyDeleteHi! Did you sand your vanity before painting, even if it was temporary? Looks great!
ReplyDeleteThanks! We didn't do any sanding.
DeleteHi! I know this is an old post but just found your blog through Instagram and was looking at all you have done in two years! I am awed and amazed! Everything you have done looks great. We are temporarily redoing our master bathroom and this post has given me great ideas to use. We are dealing with similar outdated faucet, vanity and light fixtures. Great job!
ReplyDeleteWhat a make-over! It's fabulous! I love it. Thanks for sharing!
ReplyDelete